History of creation
My favorite observatory is located in Minsk, Belarus.
The way to the construction of the observatory was not simple and a little unusual, I would have said. I have been consistent for the development of my hobby. At the beginning I was planning to gain the experience on a comparative simple (average) astrosetup at my area, and then, if it possible, to resolve the tissue about the automatic remote setup in the “right place”. In other words to set the observatory in a place with a good sky and where will be possible to work almost every night. However, everything formed quite different.
I obtained my telescope with the mount Celestron 1100 Edge HD CGEM in 2012. Pleased by visual observations I took an interest in astrophoto. I spent a lot of time and strength to understand the basics of the astrosetup construction, and to select optimal equipment for the telescope. In the process of my first astrosetup building the misfortune perceived me due to selection of the supplier who gave me the wrong camera QHY11. The camera turned out the defective one and I had to give it back. After this incident I decided to reject from any QHY equipment. As a result I lost six month and the whole autumn and spring in 2012-2013.
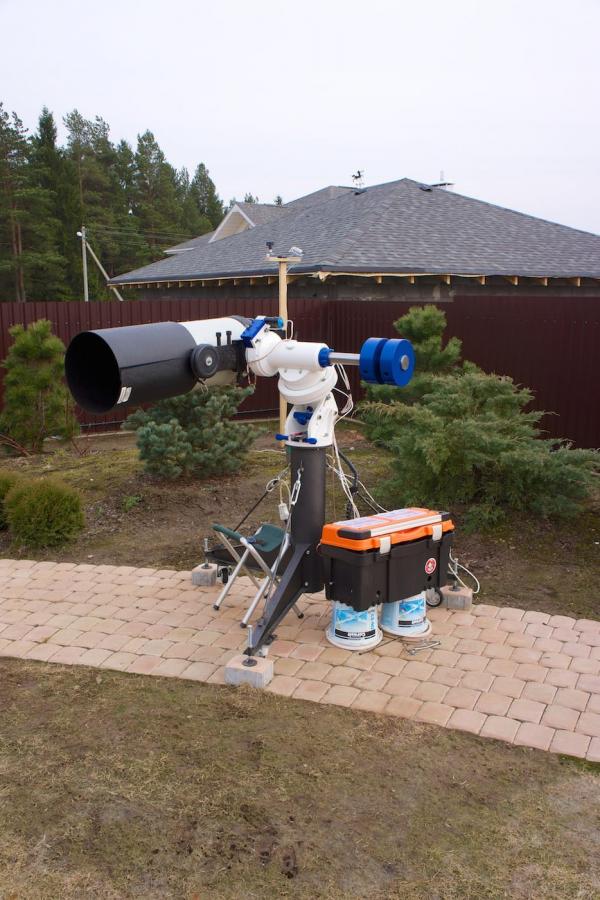
Unfortunately, I had to build the second astrosetup at the very beginning. During the process I had a choice between two chips KAI-11002 and KAF-16803 for the main camera. Both of them have the same size of pixels (9 micron), but different diagonal. The second ship was more expensive, but at the same time had the bigger size of the diagonal. Generally I bought the FLI PL 16803 camera. Also in the set from this producer I got the wheel of CFW-5-7 filters (50*50mm), the Atlas focuser, and the assortment of the filters LRGB, HA, OIII, and SII itself. At the same time I found the customer for my Celestron mount and it went to Krasnoyarsk. Meanwhile I acquired the new mount - WS-240 with the pressing of worm that is much better than the previous one by all parameters. The astrosetup was completely ready only at the end of August. At the left you can see the picture of it.
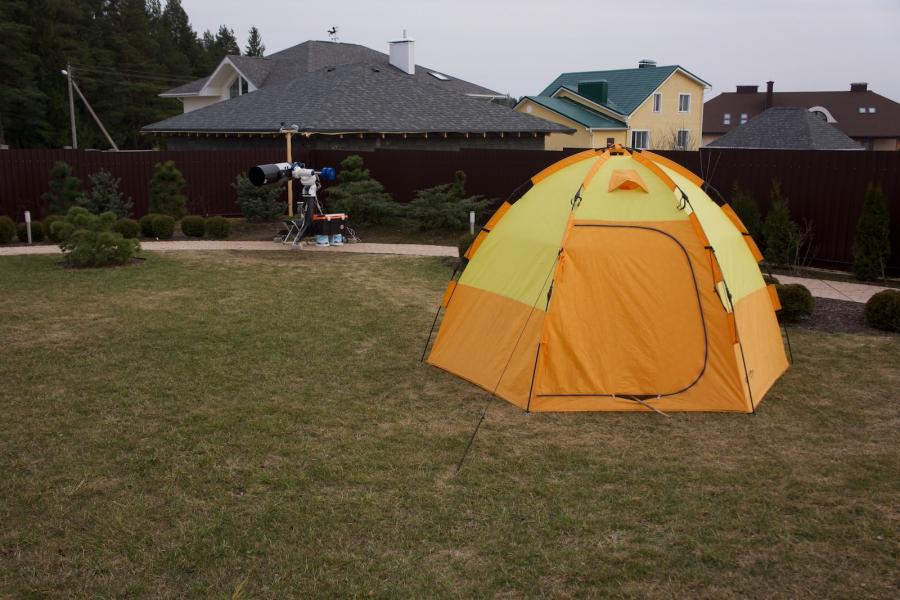
The tent for winter fishing became a great decision of use the astroscope during the autumn, winter, and spring. It has no bottom; also it is very easy to place it by lover from top to down at tent. It does not move the construction, does not force down settings, and all other bindings.
I had two main aims at that time:
• To gain experience in astrophoto and to select a reliable hardware-software setup for remote place.
• And to clarify with the place for observatory in near future. Neither it will be far away, nor will I build it at my area.
During the whole autumn and spring I finally got good characteristics about quality of the Belorussia’s sky and made a decision to construct the observatory at my area. This made everything much easier. In any case I still did not have enough for the remote setup. And I can tell it with full confidence. Despite the fact that I was working not during a lot of time, I still got enough experience with the automatic observatory.
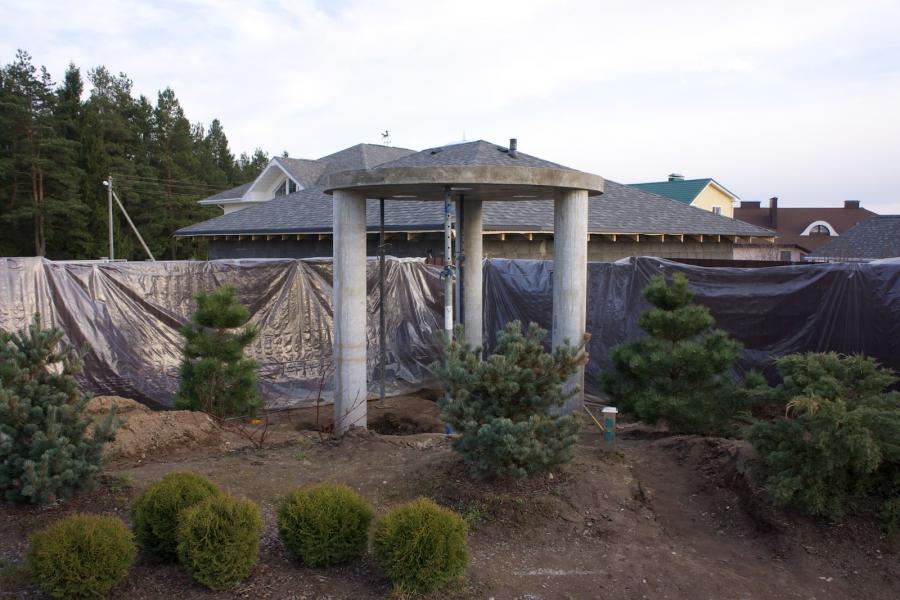
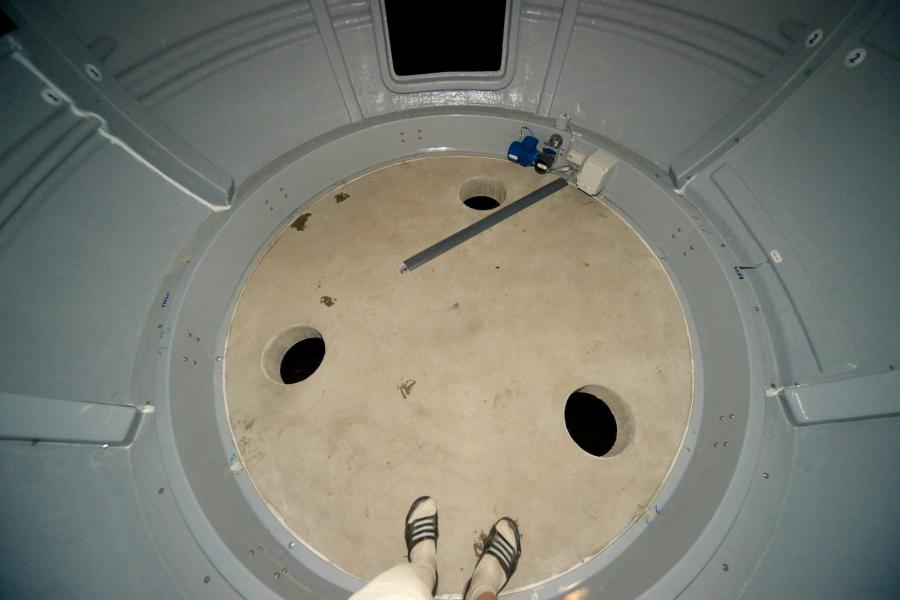
The construction began in spring: with filling of columns and building foundation for dome. I want to tell a little about this unusual construction. I was thinking about different ideas of other astronomy lovers during a lot of time, but finally decided to choose something new, not the classic variant. At the begging I knew that will build the observatory for astrophoto, but not for observations. So why I was not in lack of the special location for observatory. When the observatory was set up on three columns I solved the problem of heat flows from the ground and from the space under the dome.

At the beginning I was thinking about five columns to make the construction tougher. But I came to the conclusion that three columns is more than enough and it makes no sense to pay more money for this. Plus three columns cheaper than five.

As a result were made three hales with expansion of the bottom in the ground. All this was done with special drill for pile foundation. The installation was set and the priming was performed. The depth of each pile is 1,5 meters. At the top of each pile was made "penny" for the installation of the column with the removal of fittings for its further ligament with reinforcement in the column.
Then three asbestos-cement pipes with a diameter of 300mm were fixed on top and the work on the reinforcement was done. The height of columns is 2.5 meters above the ground. For better chapping the dome has to be higher that the level of the fence. The platform under base with a diameter of 3 meters and with double reinforcement was made immediately after the columns were set. The holes for ventilation and cable channel were established. Everything flooded at the same time. As a result I got the solid reinforced-concrete construction.
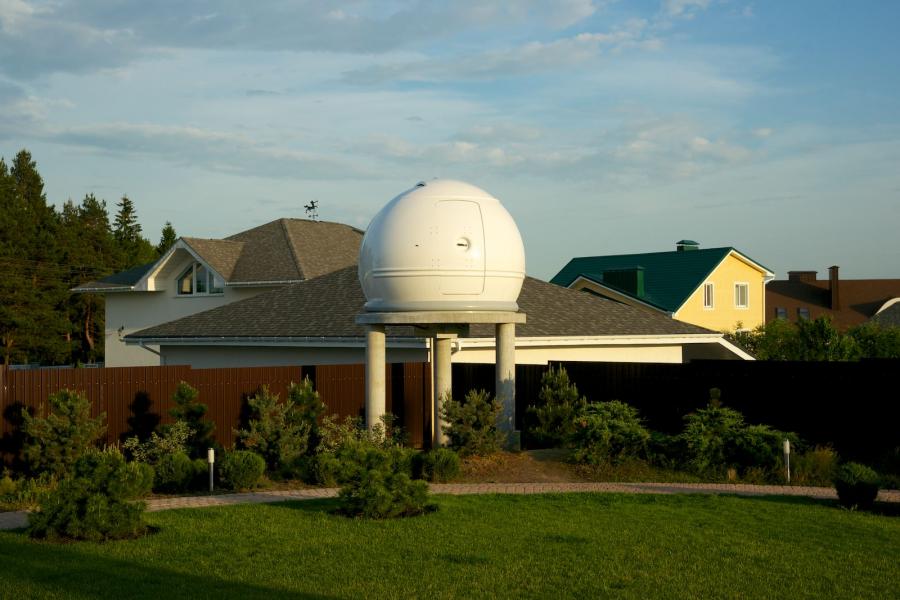
This construction was standing about 20 days until it became strong. The choice of the dome was not easy. However I decided to choose ScopeDome that is from Poland, because of some reasons:
1. The dome is made of glass-reinforced plastic (GRP), what made it lighter and the material of the dome does not have the problems with the environment impact on it.
2. The dome has the collapsible structure, what make its assembly and setting much easier. I also want to notice that I did not have any problems during assembly. All adjusted, disassembled and then sent to the customer.
3. The dome delivers with the full set of automatics, including the heading system for northern latitude. The moving part of the dome connects by radio and can revolve in all ranges, without any limits.
4. The company has provided the delivery and made a 10% discount on the full set.
I collected and set up the dome during one day with my 10 years old son. Only once I needed the help of my friend when we had to raise each lateral halve of the dome.
Certainly, one of the most important task during the design of the automatic observatory was the development of control system for all iron. We can talk a lot about negative and positive here, but I used my experience when my telescope was standing in the open air during the autumn and spring. During this time, I made several decisions:
1. The main power bus is 12V. For permanent and continuous work I used accumulator batteries on 17 Ah. I had three of them in this construction. Mount's controller and the computer are powered 19V. For them I assembled two automotive transducers 12V-19V. Also I installed UPS (uninterruptible power supply) on 1200AV for the dome. He allows to close the dome in a case of power failure 220V.
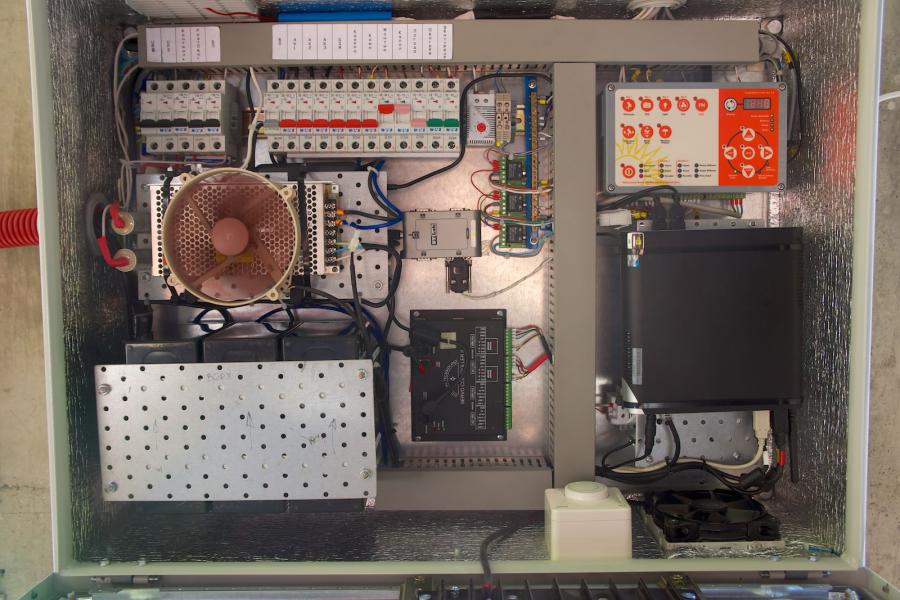
2. In the role of the control computer I use ASUS EeeBox PC EB1503 on the base of Atom processor. This computer on its board has 6 USB portals. Two of them are 3.0 USB and four of them are 2.0 USB. As the operating system I use Windows 7 64 bit.
3. Everything mounts in the common cupboard, which is insulated and has its own ventilation and heating system. It is like the termobox which has the constant internal temperature about 15-30 degrees.
4. The contact carries out by the connection of astrocomputer to the home network. As the reservation system I use 3G module, which allows me to drop remotely the computer’s power and the controller of the dome.
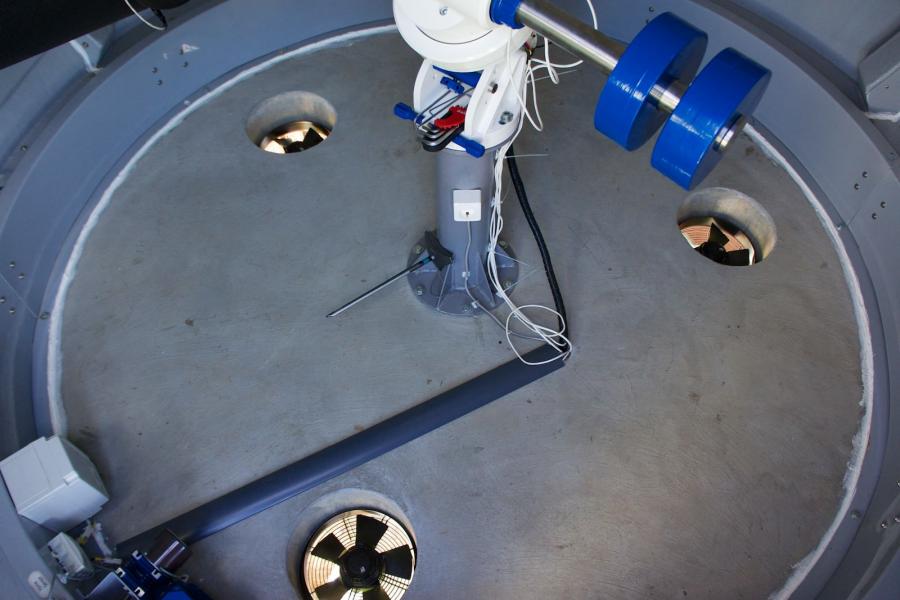
5. Also I installed the system of lowering the temperature inside the dome. In a case of appearance of differences between internal and external temperature more than on 1.5 degrees it switches on automatically.
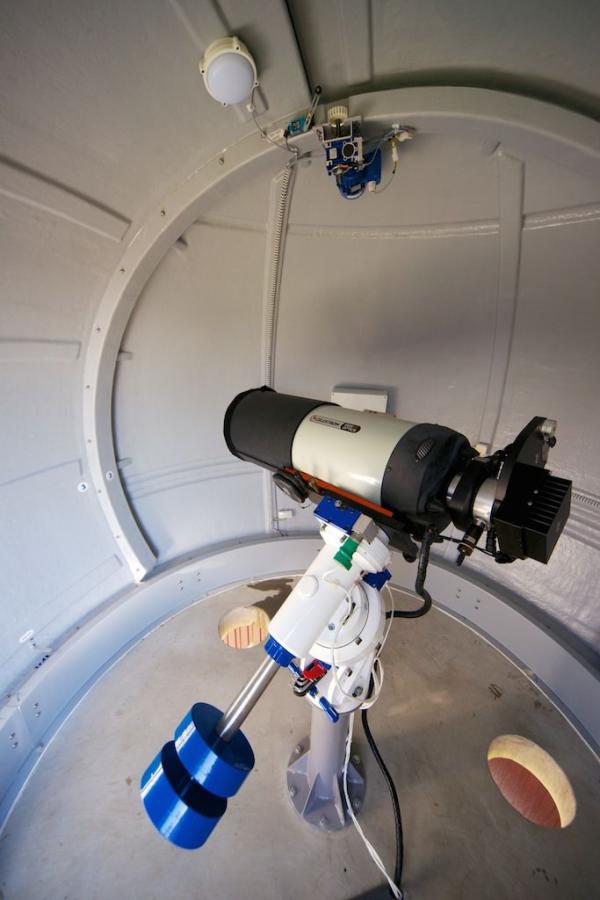
6. To control the mounting and telescopes’ position I installed the IP camera. I use D-Link DSC-2332L camera. It easily connects to the Wi-Fi, you have the possibility to fix it outside, and also this camera has infrared light. One of the most important features of this camera is the possibility to connect to the internet from any place in the world through the D-Link system. There are apps for iPhone and iPad.
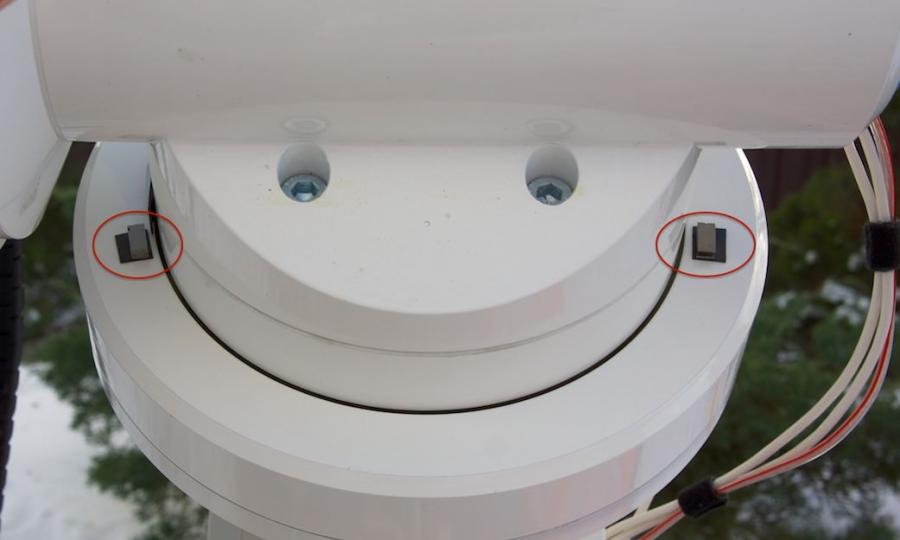
7. The system of safety stoppage of the mounting is very important if the failure of controller will occur. It’s very simple and consists of two reeds and four magnets, each reed on different axis. If the mounting goes beyond, than the power of the controller will automatically switch off. It allows to avoid any unpleasant moments and the equipment damage. The system of safety switches off remotely. At first, you have to switch on the IP camera and search where the telescope is located, then to switch off the system of safety, and move the telescope towards the east. Finally, you synchronize the controller with this direction. To tell you the truth, this system helped me several times to avoid the equipment damage.
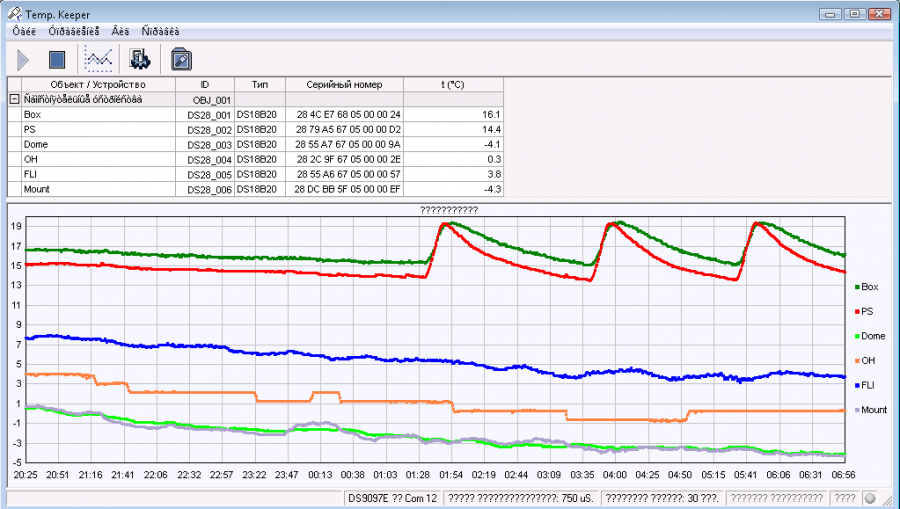
8. One more detail is a little system of monitoring of the temperature inside of the dome and box with equipment. I used digital thermometers DS18B20, which transmit the information to the computer through the controller. On this screenshot you can see how the heating system works, when the temperature increased. Also on this graph how the Kendrick or blende heating works.
In general, it is all what I can tell you now. Eventually I will try to tell you further about each system.
Hello, I have followed you on
Hello,
I have followed you on DC3 Dreams. My family is from Lithuania so we know of the weather conditions, but Kaunus must be like the tropics compared to Minsk! Best wishes with the operation. We are also putting a RoboFocus on a similar scope, a Meade 12".
Jerry Y
PS here is my set-up in California... we have fog not frost!
https://www.astrobin.com/310660/
Hi Jerry, Nice to meet you. I
Hi Jerry,
Nice to meet you. I remember your photos and your posts, both on the DC-3 Dreams and on the SBIG forum. Your astrosetup looks good. True, a lot of trees around and most likely you have high humidity.